Shai. 30 years. it/its. Art blog - mostly fan art and OCs. Commissions open.
100 posts
Some Photoshop Tips
Some Photoshop Tips
I’ve been getting quite a few asks about the process for the patterns in my stylized artworks, so I decided to put together a couple of tips regarding them.
Firstly, what you need are
— CUSTOM BRUSHES —
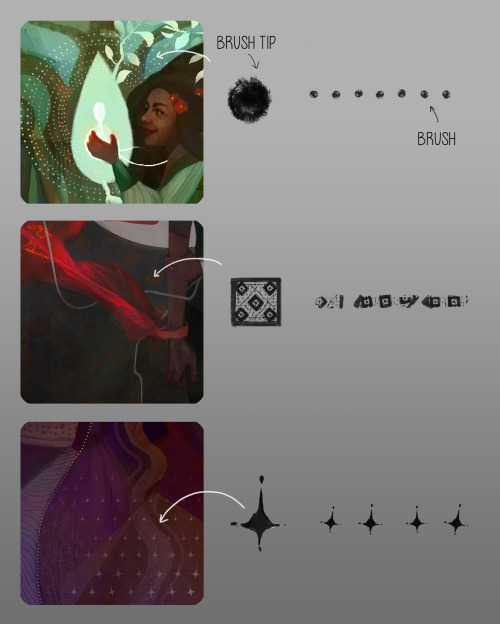
Most of the patterns I use are custom brushes I made, such as those:
For the longest time I was convinced making brushes must be super extra complicated. I was super extra wrong. All you need to start is a transparent canvas (2500px x 2500px max):
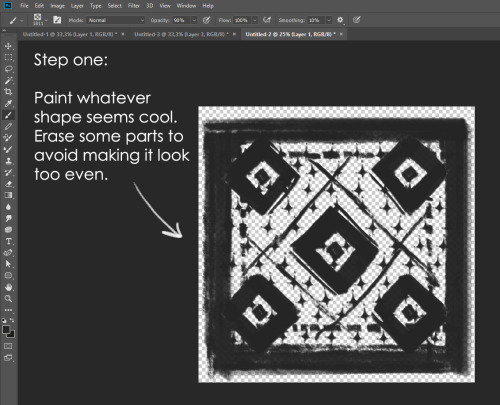
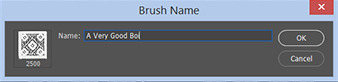
This will be your brush tip. When you’re satisfied how it looks, click Ctrl+A to select the whole canvas and go to ‘define brush preset’ under the edit menu
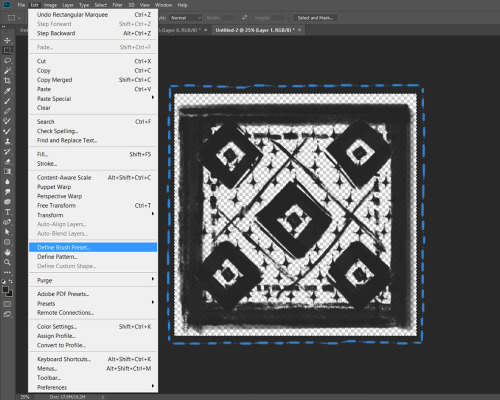
You will be asked to name your new glorious creation. Choose something that describes it well, so you can easily find it between all the ‘asfsfgdgd’ brushes you’ve created to be only used once
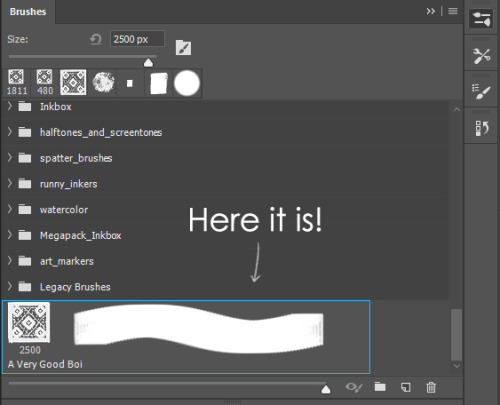
This is it. Look at it, you have just created a photoshop brush. First time i did I felt like I was cheated my whole life. IT’S SO EASY WHY HASN’T ANYONE TOLD ME
Time to edit the Good Boi to be more random, so it can be used as a Cool Fancy Pattern. Go into brush settings and change whatever you’d like. Here’s a list of what I do for patterns:
- under Shape Dynamics, I increase Size Jitter and Angle jitter by 5%-15%
- under Brush Tip Shape, I increase spacing by a shitload. Sometimes it’s like 150%, the point is to get the initial brush tip we painted to be visible.
- If I want it to look random and noisy, I enable the Dual Brush option, which acts like another brush was put on top of the one we’ve created. You can adjust all of the Dual Brush options (Size, Spacing, Scatter, Count) as you wish to get a very nice random brush to smear on your backgrounds
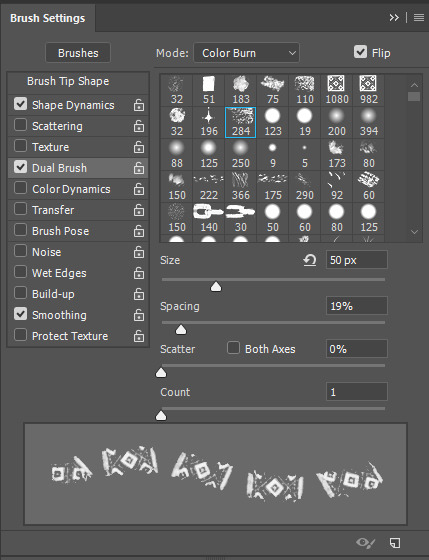
The result is as above. You can follow the same steps to create whatever brush you need: evenly spaced dots that look like you painted them by hand, geometric pattern to fill the background, a line of perfectly drawn XDs and so on.
BUT WAIT, THERE’S MORE
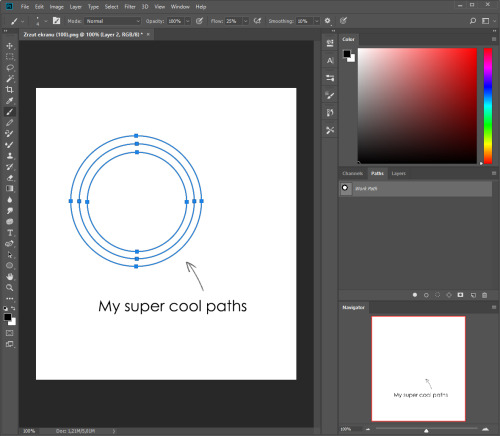
— PATHS —
But what if you want to get lots of circles made of tiny dots? Or you need rows of triangles for your cool background? Photoshop can do all of that for you, thanks to the magic of paths.
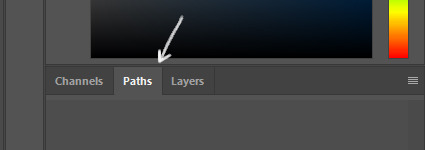
Typically, paths window can be found right next to Layers:

Draw whatever path you want, the Shape Tool has quite a bit of options. Remember, paths are completely different from brush strokes and they won’t show up in the navigator. To move a path around, click A to enable path selection tool. You can use Ctrl+T to transform it, and if you move a path while pressing Alt it will be duplicated.
Now, pick a brush you wish really was in place of that path you’ve drawn and go to layers, then choose the layer you want it to be drawn on. Then, click this tiny circle under the Paths window:

Then witness the magic of photoshop doing the drawing for you while you wonder how tf have you managed to forget about this option for the past 2 years
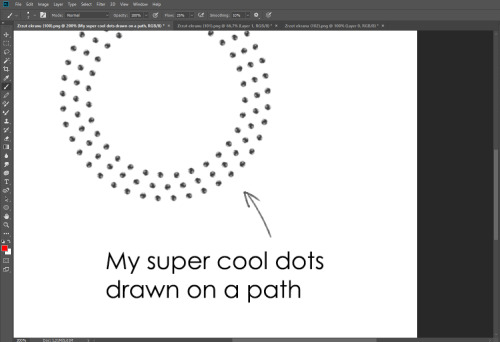
You can combine special brushes and paths for all sorts of cool effects. I mostly use them in backgrounds for my cards, but you can do whatever you want with them.

I hope that answers the questions for all of the people who were sending me inquires about the patterns. If you have any questions regarding this or any other Photoshop matter feel free to message me, I’m always up for complaining about how great and terrible Photoshop is C’:
-
 hannashiro reblogged this · 9 months ago
 -
 andiv3r liked this · 9 months ago
 -
 starsunsblog reblogged this · 9 months ago
 -
starsunsblog liked this · 9 months ago
-
 reblogliquidstarrr reblogged this · 9 months ago
 -
 lorlocks liked this · 9 months ago
 -
 verben-erben liked this · 9 months ago
 -
 dreamcatchintilldawn reblogged this · 9 months ago
 -
dreamcatchintilldawn liked this · 9 months ago
-
 dors-ee liked this · 10 months ago
 -
 black-eco-sage liked this · 10 months ago
 -
 gaiathemuse reblogged this · 10 months ago
 -
 nanuk-dain liked this · 10 months ago
 -
 psyantics reblogged this · 10 months ago
 -
 pastelracoon reblogged this · 10 months ago
 -
katppi liked this · 10 months ago
-
 id0ntc4r3reallyd0nt-blog liked this · 10 months ago
 -
 kaethedumbfox liked this · 10 months ago
 -
 jigglewarrior liked this · 10 months ago
 -
 auroblaze liked this · 10 months ago
 -
 tajmutthall liked this · 10 months ago
 -
 fitzylovesjemma reblogged this · 10 months ago
 -
 prettyandred liked this · 11 months ago
 -
 kikithething liked this · 11 months ago
 -
 youseethehat reblogged this · 11 months ago
 -
 xxcringecake69xx liked this · 11 months ago
 -
 jooemarmay liked this · 11 months ago
 -
 hiimsuperawkwarddontmindme liked this · 11 months ago
 -
 witticismz liked this · 1 year ago
 -
 rosifire liked this · 1 year ago
 -
 evelinn-zaerien reblogged this · 1 year ago
 -
 deltashell reblogged this · 1 year ago
 -
 justhereforfun0 liked this · 1 year ago
 -
 etrye liked this · 1 year ago
 -
theletterv23 liked this · 1 year ago
-
 thatcharmingjerk reblogged this · 1 year ago
 -
 legends03kai liked this · 1 year ago
 -
 chessb0r3d liked this · 1 year ago
 -
 neyel-dot-com reblogged this · 1 year ago
 -
 owerewolf13 liked this · 1 year ago
 -
 winterofherdiscontent liked this · 1 year ago
 -
 artking-4 reblogged this · 1 year ago
 -
 munchonbrows liked this · 1 year ago
 -
 punkrockpizzaprince reblogged this · 1 year ago
 -
 melonpopped liked this · 1 year ago
 -
 borfie liked this · 1 year ago
More Posts from Haikeri
Woke up at 2am and couldn’t fall back asleep so I made a tutorial on the Photoshop techniques I use most frequently. Starting with the sketch:
adjustment layers: specifically the hue/saturation slider in this case, allows you to color correct quickly

lasso tool: for sharp edges!

alpha lock: useful for painting within a pre-defined area (especially useful when painting characters)

x (hotkey) : toggle between foreground + background colors- let’s you easily blend between 2 colors

ctrl/cmd click : quickly change current active layer. Especially useful if you’re burdened with too many layers (or just very disorganized)

clipping mask: similar to alpha lock, but can add details without changing/ painting directly on the previous layer. I often use them to test out + apply gradients.

layer styles: I didn’t use any in this image, but the possibilities for layer styles endless, from simply adding a quick outline (useful for die cut demarcations when making stickers!) to creating more seemingly complex appearances. Here’s a gif of Nick Carver using layer styles (a combo of drop shadows + inner shadows) to quickly make the illusion of snow but with simple strokes.

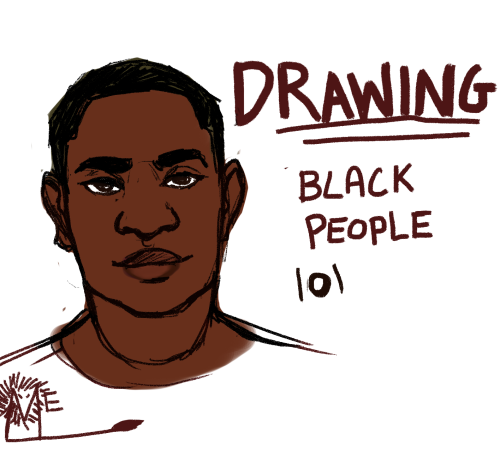
So you might be saying: Lion why a guide on drawing black people? Well young blood it’s because a lot of people cant…seem…to draw…black people..Amazing I know.
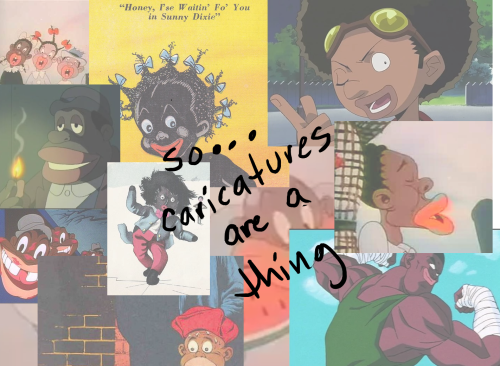
Racist (caricatures) portrayals of black people have been around forever, and to this day people can’t seem to draw black people like they are human. If your artwork resembles any of the above even remotely your artwork is racist and offensive. If you try to excuse that as a stylistic choice you’re not only a terrible artist, but racist too!!! Congrats.

Whitewashing is also a problem. A lot of people refuse to draw black features on canonly black characters. While this example isn’t colored, lightening the skin-tone of a character is also considered whitewashing. So lets start with features!

Now all black people have different noses thats a no-brainer, but black noses tend to have flatter bridges, and wider nostrils. Please stay from triangular anime noses and small button noses. Your drawings should not depict black people with abnormally large noses. (Especially if you do not draw other characters this way)
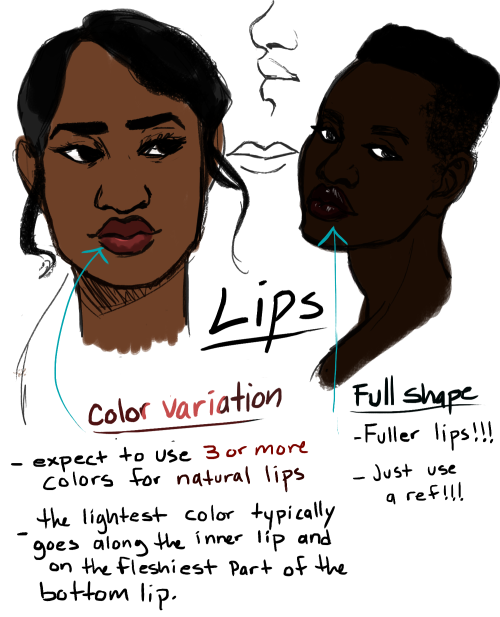
If you feel like the way you draw lips on black characters is offensive or resembles a caricature,it probably does and you should change it. ABSOLUTELY AVOID PLACING LIPS AT THE BOTTOM OF THE FACE.

Hair is so diverse! Please get used to drawing braids, locs,kinks and coils! If you can learn to draw ringlets and long waves you can learn how to draw black hairstyles.
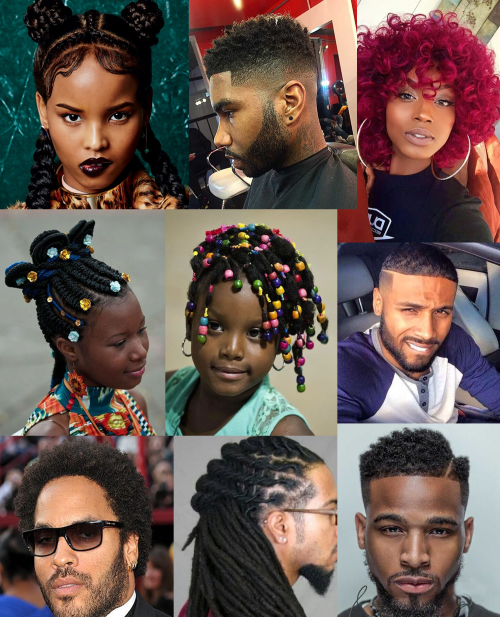
Add clips! Learn how to draw baby-hairs and never be afraid to add color Pinterest and Google are free my dudes! Also try using square brushes for blocking in coils.
OK THAT’S ALL YOU GUYS