« Polyfragmented System / C-DID » ⁚ ↳ Endos and pro-endo DNI ↷ ⁚ Ξ He / They / It Ξ
375 posts
We Use Both Of The Terms
We use both of the terms
But being more theoretically, introjects in CDD context are alters who formed based on something that already existed, and because the oc already existed when the alter formed... Well yeah, it's an introject
This can also applied to any other creation the system mades and then gets in the system as an alter, they're introjections
If I'm not wrong autoject is a term for all the introjects whose source is something created by someone else of the system, some autojects don't consider completely like introjects because the brain made them but not from scratch, so you can just use that if you want
Labels are that, labels, made for your own comfort, so if they don't like introject/autoject/brainmade let them use whatever they want, but theoretically speaking they're introjects, or if they wanna be a little bit more introject separated but still explain they have an "external" source they can use autoject
another serious question for the osddid community
when you make an oc and then get an alter of said oc is that technically an introject? like one of ours just considers herself brainmade since she barely associates with her source anyway (literally an oc we had at like 12) but then another considers themself an introject so it’s??
like are they technically brainmade since yeah it’s an existing character but it’s YOUR OWN existing character or like? 😭
ik labels don’t matter that much but i’ve been curious for a while now
-
 rue1152 liked this · 1 year ago
 -
 cringey-systems reblogged this · 1 year ago
 -
 poognthebrainbois liked this · 1 year ago
 -
 onyxolay liked this · 1 year ago
 -
 corvus-coraxxx liked this · 1 year ago
 -
 arrayoflightarchives liked this · 1 year ago
 -
 somepoetwannabe liked this · 1 year ago
 -
 river0flower liked this · 1 year ago
 -
 chronic-creation liked this · 1 year ago
 -
 delphientropy liked this · 1 year ago
 -
 wretched-aliengirl liked this · 1 year ago
 -
 clown-cars-blog liked this · 1 year ago
 -
 celestialsyndicate liked this · 1 year ago
 -
 persmo reblogged this · 1 year ago
 -
persmo liked this · 1 year ago
More Posts from Persmo
We call ourselves persmos! Yeah, like our sys name
It has a very large history and therefore context, it makes us feel mor ourselves persmos than alters, although we tend to use alters when talking about ourselves publicly because people don't know what persmos mean lol

Our blogs are gonna be a little abandoned till Monday and I feel bad about it TT
Guys I can't, everytime I think I'm about to finish there's more asks and submissions
WHY NO ONE TELL ME THAT WAS GOING TO HAPPEN WITH LIKE 10 SIDEBLOGS?? 😭
(I was very aware of it and I'm indeed making more sideblogs)

yet another userbox. i am obsessed
Blinkie Tutorial
Templates you'll need:


First step, open IbisPaint and import the pink blinkie base. This is just to keep the aspect ratio the same, so don't worry about preserving the pink blinkie after you import it.

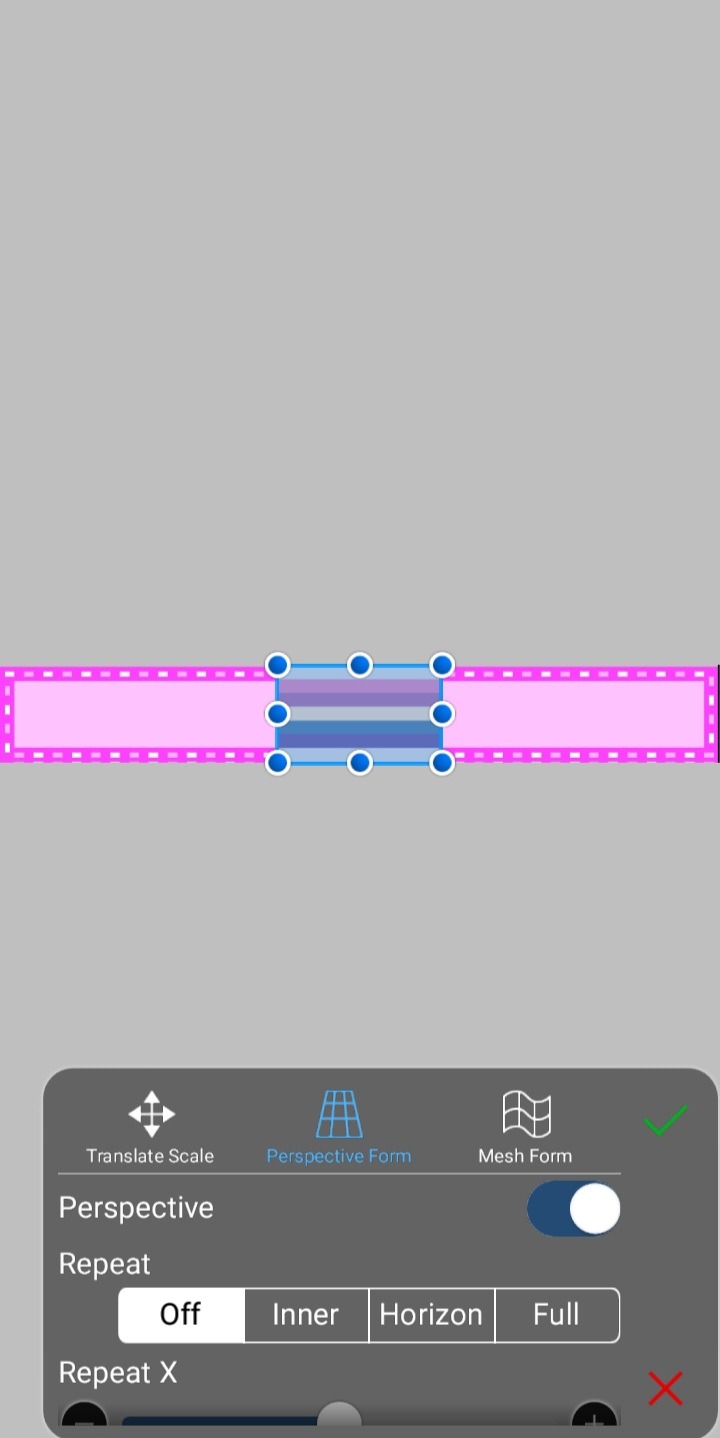
For this tutorial, I'll be making a CFS blinkie with this flag as the background. You can use any color or background. If you're using a horizontal striped flag like I am, be sure to select perspective form so it will automatically resize, and then you can stretch it to fit the blinkie.

Now that your background is done, you can add text, decoration, etc!

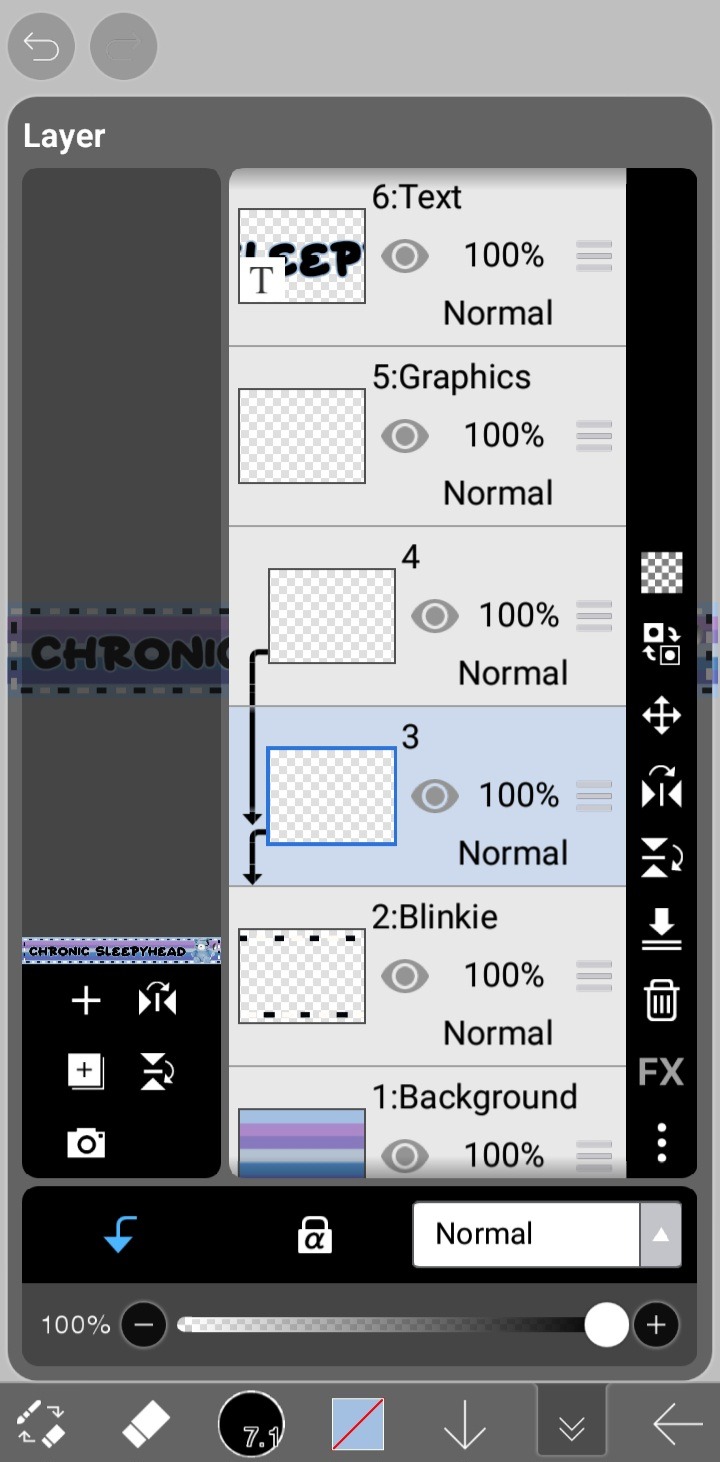
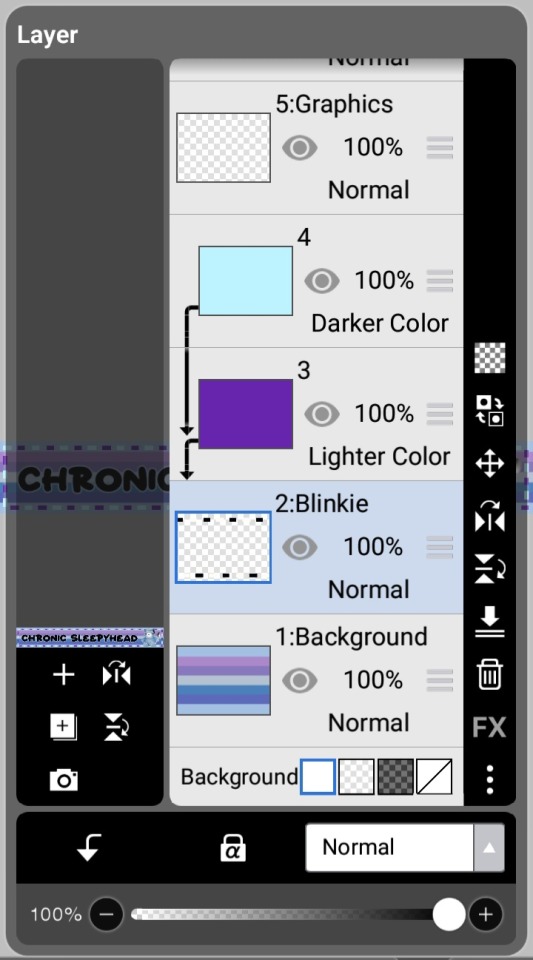
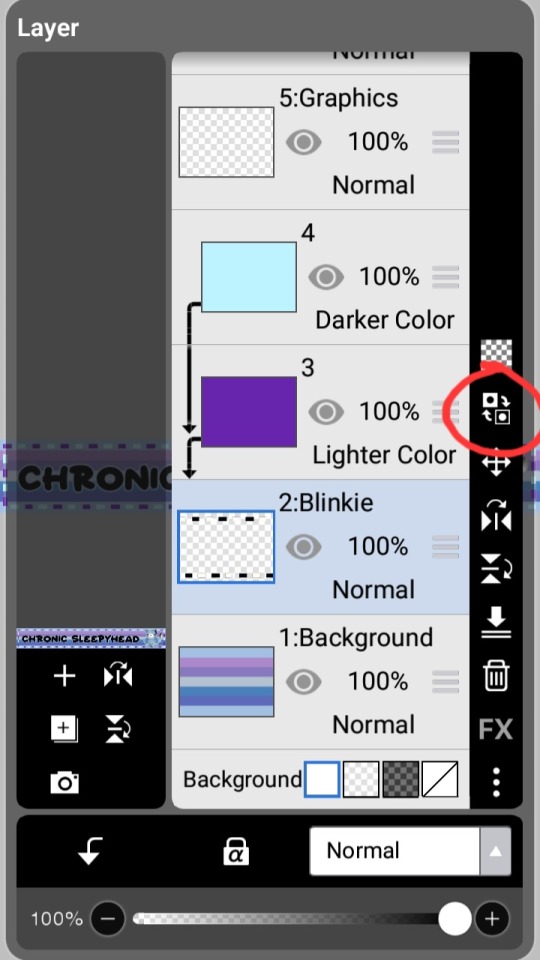
Now it's time to add the actual blinkie part. Insert the black and white template on a new layer right on top of the background. It should fit perfectly.


If you want to keep it black and white, ignore this next step. Here I will show you how to color the dots easily. I'll be picking purple and blue for my dots.
Make two layers above the blinkie part and set them both to clipping layers. One will be for recoloring your white dots, the other for you black dots.
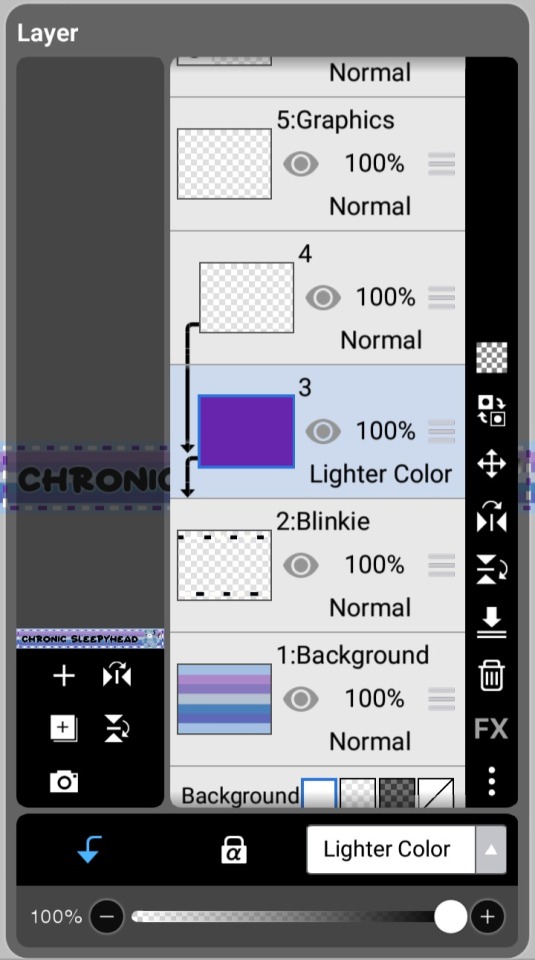
Color one of the layers entirely with your first color, then set it to "Lighter Color". This will color only your black dots.
Do the same with your other color on the other layer, and then set it to "Darker Color". This will color only your white dots.
Boom! Now you've got your first frame!

To get your 2nd frame, simply click the invert button on the blinkie frame.
Now you've got both your frames!

Now just pop these frames into EzGif's Gif Maker (or any other gif maker), and you're done!
Congrats! You've made a blinkie!
