Effects - Tumblr Posts
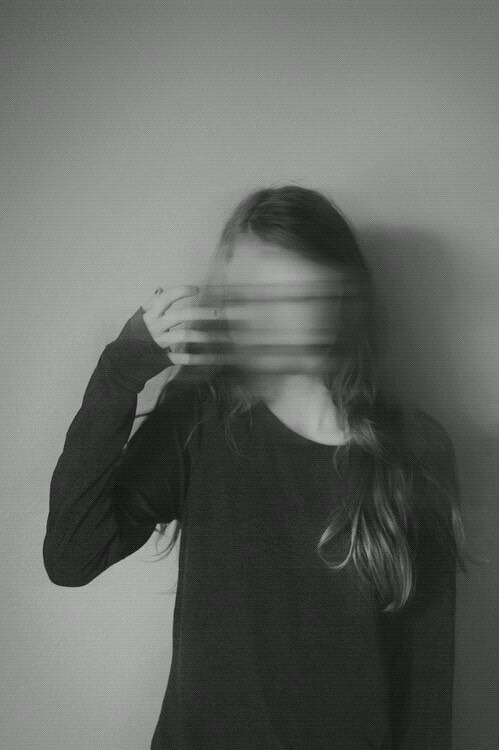
Motion Blur Gif Tutorial
Anon asked how I created the motion blur effect in the first gif in this Boba Fett gifset, so here’s a 5-step tutorial. It’s very, very easy but also very late/early and I suck at explaining things like this so I hope it’s clear!
What you’ll need:
Basic gif-making knowledge using the video timelines method (this won’t work with frame-by-frame animation)
I’m using CC 2020, but any version of Photoshop that has the timeline option will work
Tip: This effect works better on gifs with minimal movement
Keep reading
sorry if this has been asked before but how do you make your gradients look so good?
Hi Anon! First of all thank you so much 🫶
I like to use gradient maps (which I've explained here) or gradient fills + gradient tool. I'll drop a little tutorial under the cut:

GRADIENT FILL
I'll be using this gif which I've already sharpened and coloured:

First of all let's make the background pop so I'm going to add a gradient fill (Layer -> New fill layer -> Gradient) with these settings (I'm using this colour #0099ff):

Now it's the time to play with the blending settings! Depending on your scene some will look better than others but I usually switch between Soft Light, Overlay, Color or Hue. 90% of the time I use soft light but this scene looked much better using overlay:
As you can see the background looks more blue and vibrant but it's not too much you know.
GRADIENT TOOL
Now it's time to use the gradient tool to give this gif a hazy look. I haven't seen many gifmakers talk about this tool but it's soooo useful and it takes gradients to a whole new level.
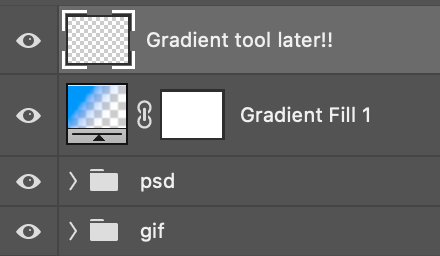
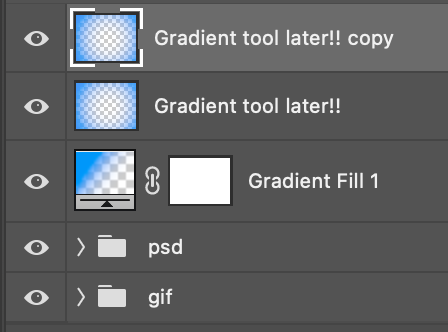
Before using this tool we'll need to add a new layer above the gradient fill, like this:
(HELP I just realised I typed “later” instead of “layer” 🤡 but let’s ignore that)
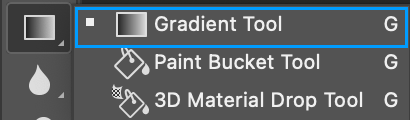
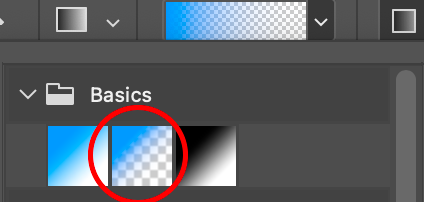
You can choose the gradient tool by pressing 'G' and then clicking here:
Make sure your gradient goes from any colour to a transparent background.
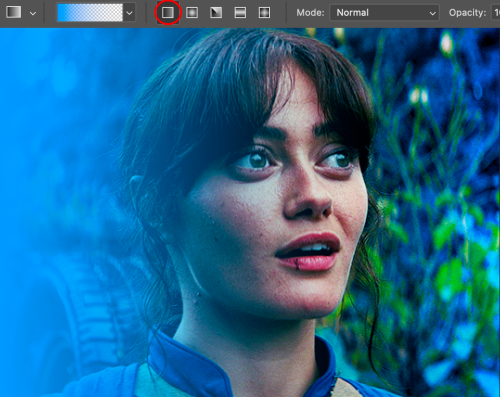
Okay so next to this gradient settings we have five different styles and each one will create a different shape. Depending on the scene I'll use the first, second or fourth one. Here are how they look:
1. Linear gradient
2. Radial gradient + Reverse (if you don't click this you'll end up with a blue circle above your gif)
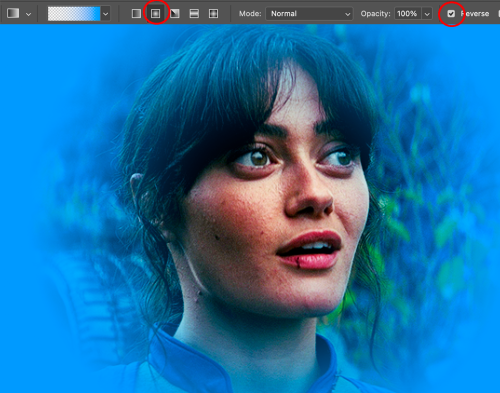
3. Reflected gradient + Reverse

This time I'm going to use the radial gradient so to draw it start by clicking on the centre of the gif and drag the line (the farther you drag it the less intense the gradient looks):
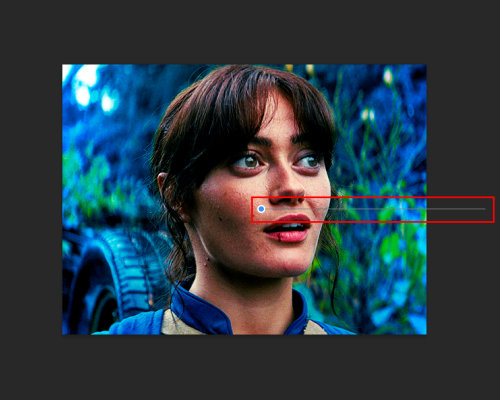
And this is the gradient:

And here comes the fun part again, playing with the blending setting and the opacity! Before doing anything I duplicate my gradient layer because I always use more than one so this is how your layers should look like:
Let's go to the first gradient tool layer and again try different blending modes: soft light, overlay, hue... Most of the time I'll use 'Soft layer' and I'll leave the opacity at 100%.
For the second layer choose 'Screen' and don't worry if your gif looks too bright because we're going to fix this by decreasing the opacity. Anything between 20-60% should look good but it depends if you want a more vibrant or more natural effect. I ended up using 40% and this is the result:

And we're done!!! As you can see the result looks much different from our first gif and it only takes a couple of layers!
Honestly the best advice I can give you is to play with the opacity and blending mode of the different gradient layers because depending on the scene some will look better than others!
art cheats
hello i am here today to not lose track of the art cheats i have discovered over the years. what i call art cheat is actually a cool filter/coloring style/way to shade/etc. that singlehandedly makes art like 20 times better
80’s anime style
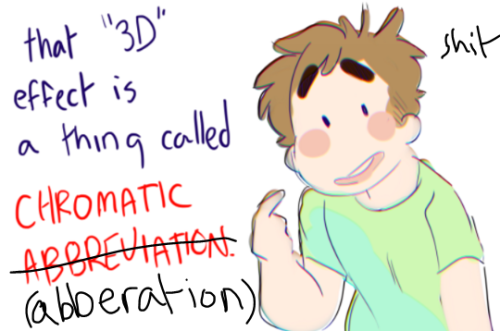
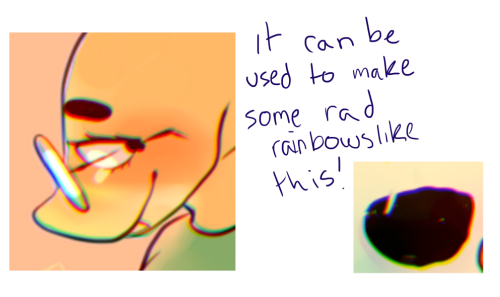
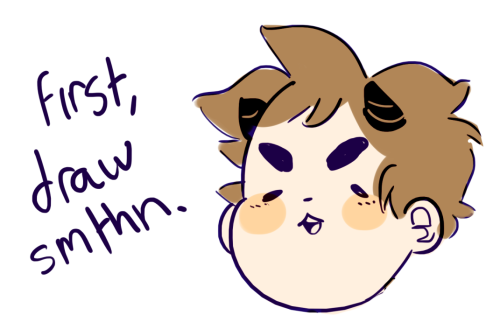
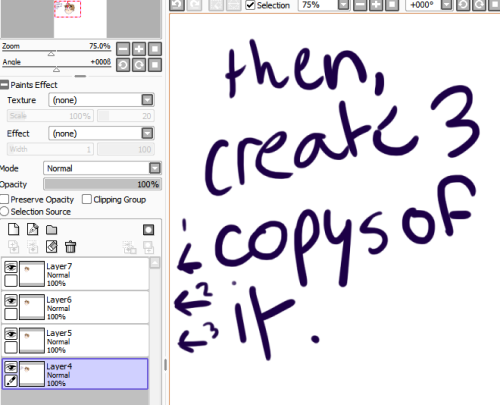
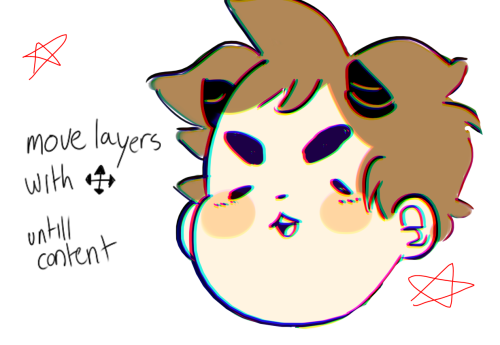
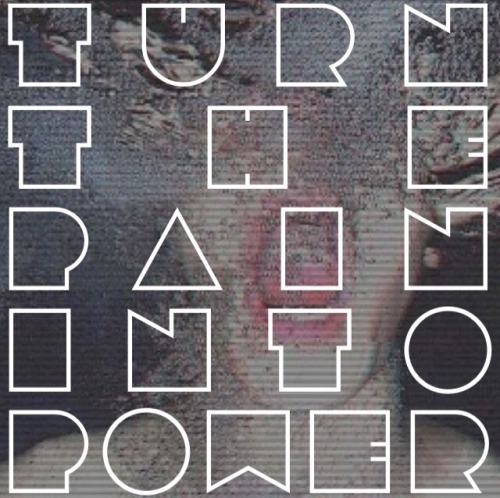
glitch effect
glow effects
adding colors to grayscale paintings
foreshortening ( coil )
foreshortening ( perspective )
clipping group (lines)
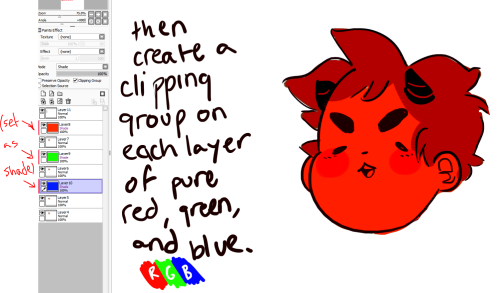
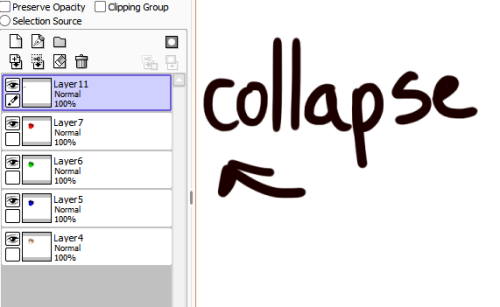
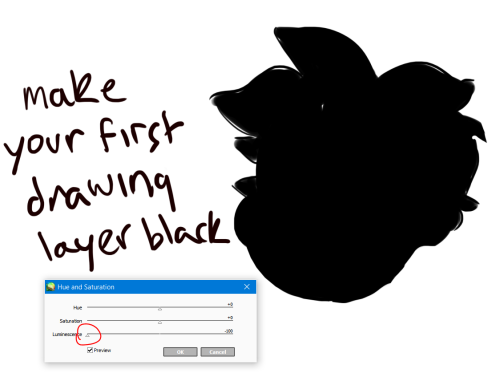
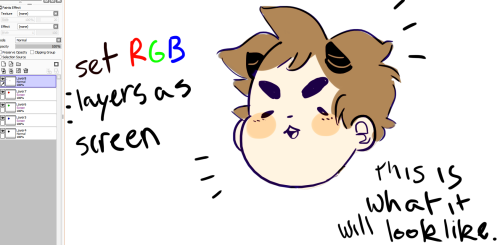
clipping group (colors)
dramatic lighting ( GOOD )
shading metal
lighting faces
that is all for today, do stay tuned as i am always hunting for cool shit like this
Disclaimer
All information in this Blog is provided "as is", with no guarantee of completeness, accuracy, timeliness or of the results obtained from the use of this information, and without warranty of any kind, express or implied,including, but not limited to warranties of performance, merchantability and fitness for a particular purpose. In no event will musicandgallery (in all meanings of this name) be liable to you or anyone else for any decision made or action taken in reliance on the information in this Blog or for any damages resulting therefrom.
In short, there are no guarantees here, whether you use it or not, it is your own risk, the consequences are all your responsibility, with no exceptions.
Texts written in a non-existent language cannot be translated properly. The responsibility for any result of the translation from this language lies with the producer of the translator.
------------------------------------------------------------------------------
Use the hashtags for targeted navigation within the blog.
Unfortunately, there is a possibility that at the end of the hashtag sequence you will find nothing. This is because the amount of data is very large. It takes a lot of time.
------------------------------------------------------------------------------


dahyun icons.
like or reblog, please. actions (rock ntz - serena atn - catwalk 3d) made by rockjealous in deviantart. follow @kiwy and @rocksource-s on tumblr. (icons 400x400)


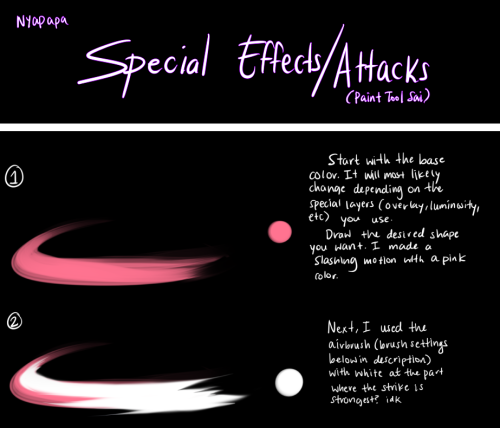
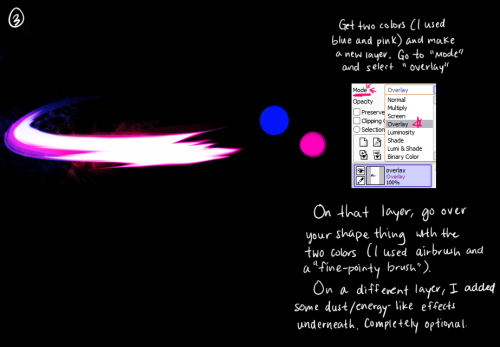
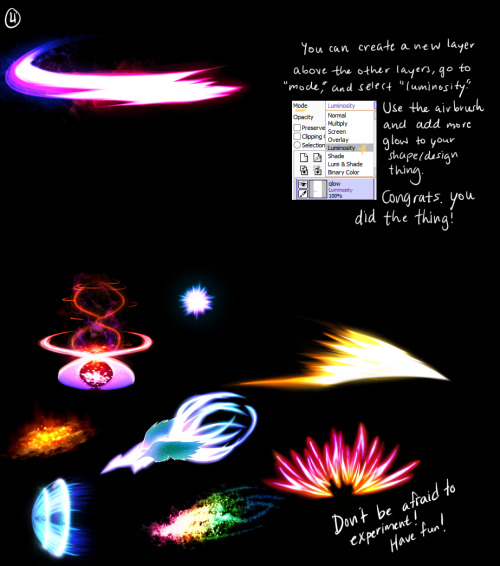
Click me for the brushes used in the tutorial A few peeps were wondering how I drew attacks in my nuzlocke comic, so I made a quick/kinda sloppy tutorial about it! Tbh it’s just me spamming luminosity and overlay layers haha ;yyy Hope this somewhat helps!


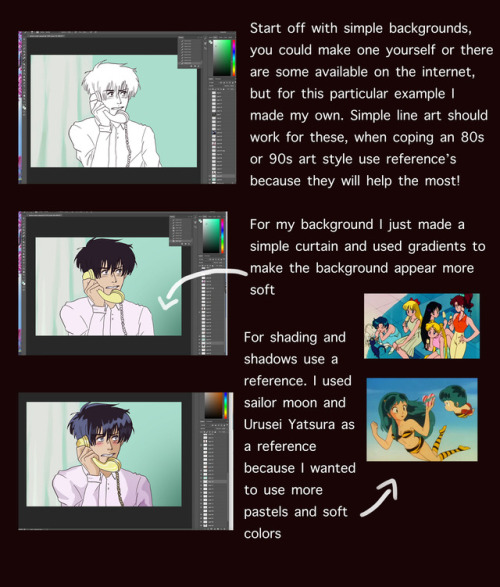
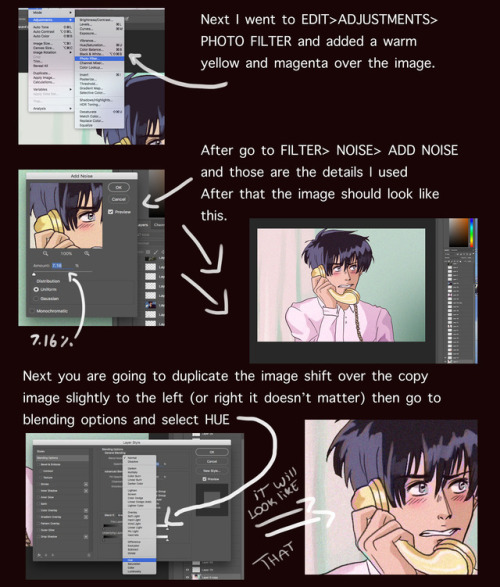
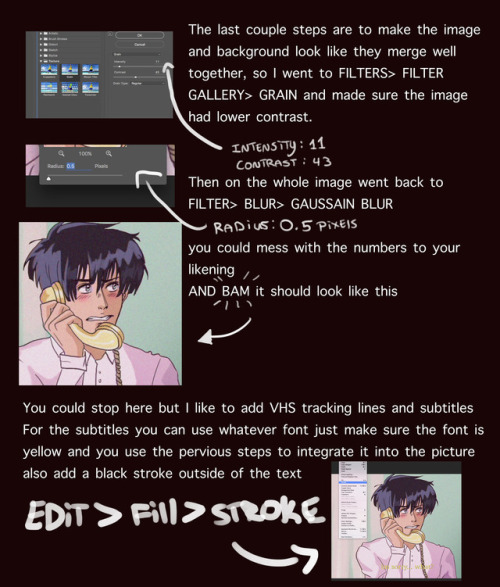
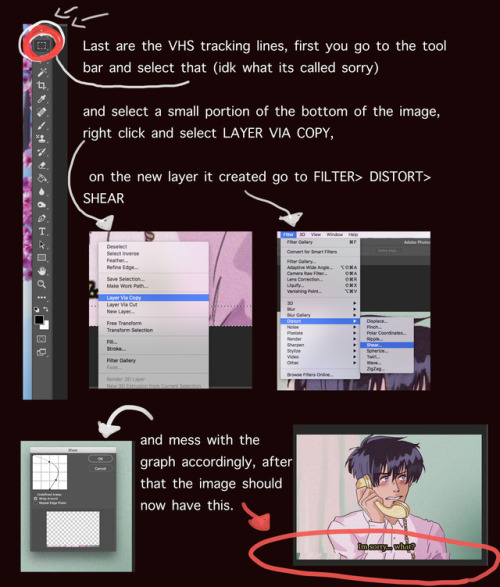
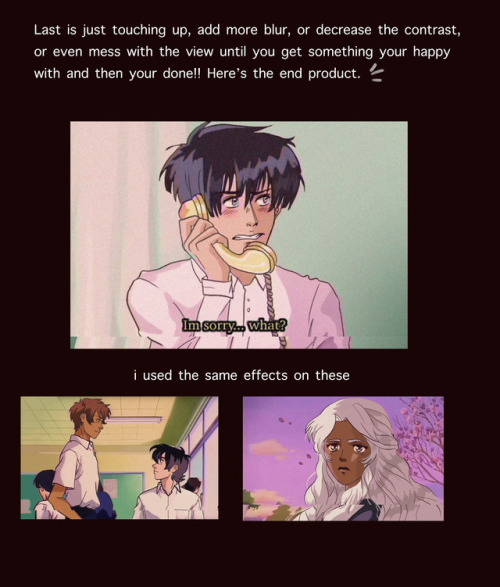
I got a lot of asks about this so I made a tutorial on how I was able to emulate the 80s aesthetic, please keep in mind I’m not an expert and what I put here is just what I personally did. I hope you guys like it and hope it helps
go crazy kids
art cheats
hello i am here today to not lose track of the art cheats i have discovered over the years. what i call art cheat is actually a cool filter/coloring style/way to shade/etc. that singlehandedly makes art like 20 times better
80’s anime style
glitch effect
glow effects
adding colors to grayscale paintings
foreshortening ( coil )
foreshortening ( perspective )
clipping group (lines)
clipping group (colors)
dramatic lighting ( GOOD )
shading metal
lighting faces
that is all for today, do stay tuned as i am always hunting for cool shit like this
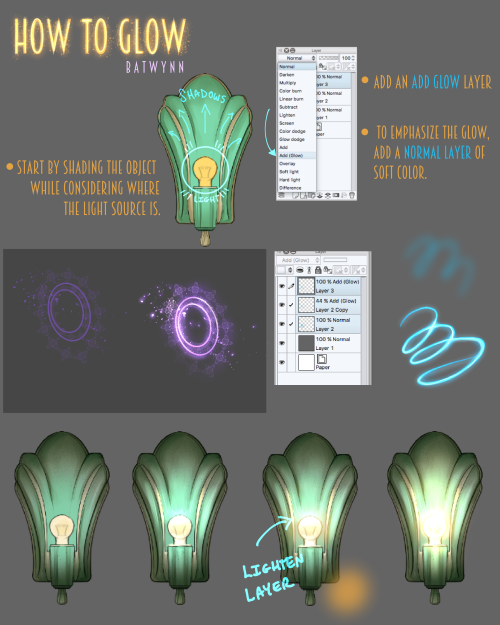
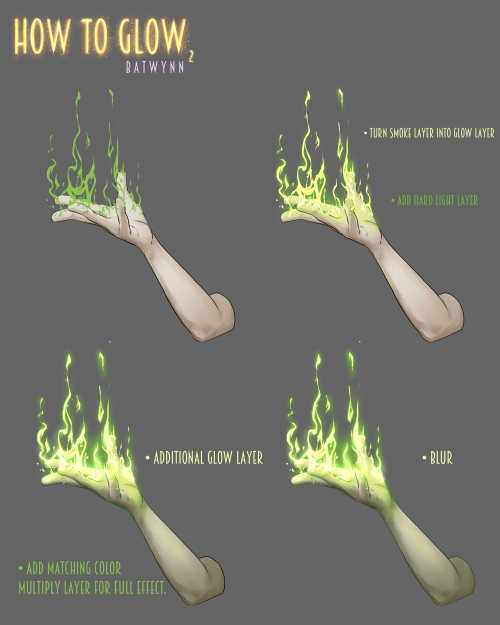
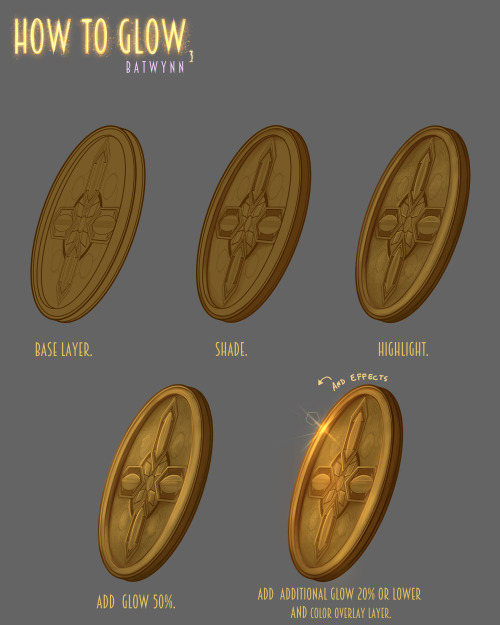
Someone asked how I do the glowy thing, soooo, here’s some how to do the glowy thing in Manga Studio. :3
For more tutorials, please check out my Patreon to help keep me funded.